Make your own fire starters and stockpile them for later
02/25/2016 / By usafeaturesmedia
(Bugout.news) You have to say one thing about the human race – people sure are innovative, and that’s a good thing for the prepper/survivalist who is trying to be prepared for any worst-case scenario.
With that in mind, you should know that we humans have devised a number of ways to make sure we can start a fire in any whether, in any setting, to heat our food, keep us warm and to ward off harmful critters.
Like your ability to sanitize water, your ability to start a fire should be redundant; always having a backup plan will ensure mission success. Check out these DIY fire starters you can make at home and store in your bugout gear:
Waterproof dryer lint fire starter:
Most of us have washers and dryers in our homes, and all dryers produce lint. Who knew it could become your next fire starter?
Let’s gather some supplies first:
- Dryer lint
- An empty cardboard fiber egg carton (not Styrofoam)
- Old Candle Stubs or a box of canning wax
- Dental floss
- Scissors
Next, cut your wax into smaller pieces so they can melt easier.
Fill each egg carton slot with the dryer lint; pack them pretty tightly with as much lint as possible so they will burn longer.
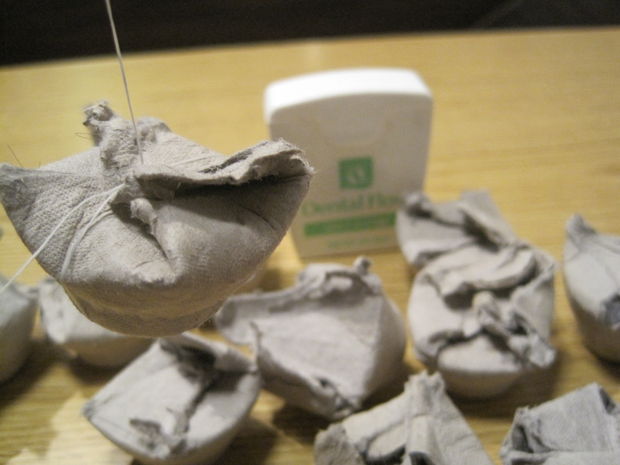
Using your scissors, cut out each individual egg compartment filled with lint and then fold each compartment over on itself.
Using the dental floss (or any disposable string), tie each fire starter, allowing for a 3-4 inches of string (as if you’d be hanging a Christmas ornament on a tree).
Put your wax into a disposable glass jar or larger aluminum can, and put the container in a pan of water. Keep the stove temperature low enough that the container doesn’t tip over. When your water boils, your wax should be fully melted.
Now, turn off the stove burner and grab your lint-and-egg crate containers. Holding onto the length of string, lower the fire starters into the wax (Tip: you may need to use another utensil to push the fire starter below the wax line).
Once you dip the fire starter, place them on a disposable surface, like paper towels, for drying. For extra waterproofing, drizzle any remaining wax onto the fire starters.
In about 1-2 hours they should be completely solid.
Next, you can test your fire starter; light one end and watch it slow-burn. Some say they have had burn times lasting up to 15 minutes.
Here is a video demonstrating the construction of these little fire-starting gems:
As always, test your fire starter before you actually need it.
Bugout.news is part of the USA Features Media network of sites.
Tagged Under: fire starter


